-
1 Attachment(s)
18 down-firing EGG shaped sub build
I ordered the driver, bought the wood, and will be starting the cutting this weekend. This will be a bit of an unusual build. Some will say that it will be ugly, but the wife has given her stamp of approval, and more importantly, I like it. It should be a nice step up from my current Titanic III 15.
The driver will be a Maelstrom-18".
Amp will be a Behringer EP4000.
EQ will be a Behringer DSP1124P Feedback Destroyer.
Using ¾ MDF to make a 5.75 cubic foot sealed enclosure (internal).
Walls to start at 2 thick and then be sanded down to maybe 1&3/4.
I dont have any graphics software but have managed to put something together with Excel & Word. Here is a cross section of what it should end up looking like. It will be 30 wide by 35.25 high. I have noticed that with Excel, dimensions will be skewed from one computer to the next depending on settings. The width should be 85% of the height, so if you want to see it scaled properly, you may need to do some stretching of it.
What do you think?
-
Awesome project, but why not use sonotube and make a cylindric enclosure? Would be much easier to make!
http://i61.photobucket.com/albums/h69/ecir38/LLT/37.jpg
Also, the sub's Qts suggests that it would work well (maybe better) in a ported enclosure. What program did you use to get that volume?
-
Thanks AA,
A cylinder would not be as unique. This will be a one of a kind work of art. (And it gives me something to do while wifey & baby are out of town)
I checked out the graphs available from Kevin’s website. I like the in room responses for sealed. Besides, I’ve heard and built many a speaker. Sealed almost always sounds better to my ears. With 18” being driven by almost 2500 watts, it should be more than loud enough for me.
-
As long as you know what you're doing :thumbsup:
If you need any advice let me know.
-
I could use someone to hold my wood while I cut it.:ihih:
-
1 Attachment(s)
Here are a few sub ideas just in case... :D
Rubix cube sub
http://dvice.com/pics/rubiks1.jpg
The Deathstar
http://hotimg23.fotki.com/a/91_114/2...rSubwoofer.jpg
A true dipole subwoofer by Elemental Designs
http://blog.evaria.com/wp-content/up.../dodecasub.jpg
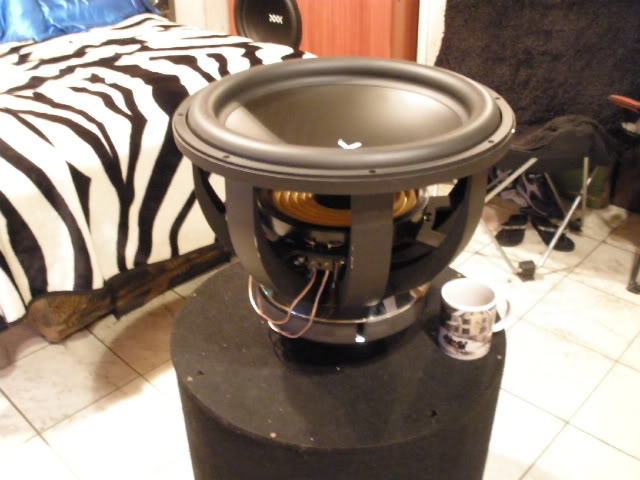
And finally the monster RE XXX subwoofer driver
Attachment 6868
-
-
GM maybe I have been around the medical field too long but it looks like a suppository.
-
The Rubix Cube is awesome, and they even solved it!
-
GM...that looks AWESOME!
You probably know this already...but especially for an 18" woofer. BRACE that cabinet.
Easiest is probably just shelf braces running across at 2 layers with big holes in them...don't make it symmetrical and you'll help break up internal resonances a bit too...
What are you using for damping material?
And how are you connecting the layers? Glue and brad nails?
Solid choice of amp. You are unlikely to ever come near clipping that jobber. You just using binding posts to connect it to the woofer?
Geez, I feel puny with only two 15" subs.:(
-
Quote:
Originally Posted by kexodusc
GM...that looks AWESOME!
You probably know this already...but especially for an 18" woofer. BRACE that cabinet.
Easiest is probably just shelf braces running across at 2 layers with big holes in them...don't make it symmetrical and you'll help break up internal resonances a bit too...
What are you using for damping material?
And how are you connecting the layers? Glue and brad nails?
Solid choice of amp. You are unlikely to ever come near clipping that jobber. You just using binding posts to connect it to the woofer?
Geez, I feel puny with only two 15" subs.:(
Thanks Kex. I’m glad you like the design.
I was wondering about bracing. There are no flat walls that will be able to flex. I’m using all rings. Circles are much stronger than boxes. The walls will mostly be 2 inch thick except for a few that will be 4 inch thick. Will there still be a need for bracing? If so, I could just make one ring a solid disk and then cut a bunch of holes in it.
I will be using 2 inch Mineral Wool. The case of 6 is way more than I’ll need but I may find other uses for it around the house. http://www.atsacoustics.com/item--Ro...f-6--1006.html
Glue and screws. This way I will need minimal clamping for the glue to dry. Just normal yellow wood glue. Thinking of maybe 2 inch screws so each will help to hold 2 or 3 pieces together. I’ll drill and countersink first.
The amp should be good. Bench tests show it at 2400 watts RMS .1% THD bridged to 4 ohms. I’ll run it as is for a while to see if the fan bothers me before I attempt the fan mod. I’ve read that the EP4000 is the same as the EP2500 with minor changes, including a quieter fan. We’ll see.
Ordered these posts from PE. http://www.parts-express.com/pe/show...TOKEN=93446984
And these T-nuts. http://www.parts-express.com/pe/psho...umber=081-1090
Also received 10 feet of BlueJeans 10 gage wire. That should be enough for my needs.
I believe that two 15” subs will outdue one 18” sub. No need to feel puny.
-
Quote:
Originally Posted by JohnMichael
GM maybe I have been around the medical field too long but it looks like a suppository.
Uh yeah.... It's because you've been in the medical field too long. That's what we'll go with.... :nonod:
What's my excuse?:ihih:
-
Kex, do sealed speaker enclosures generally need to be loosely stuffed? Does this also apply to sealed subwoofer enclosures?
-
That looks like an awesome design indeed!
I agree with Kex though, brace it, brace it real serious!
what glue are you going to use to glue the layers to each other? whichever you use, be sure to do only 2 layers at one time, and clamp them, as good as possible, you don't want any holes in the glue...
btw, are you leaving the walls like that? or are you planning on using a filler of some kind (or cement, which might be more appropriate :p), to make it a smooth/real egg like enclosure?
Good luck, and don't cut your fingers of :p
Keep them spinning,
Bert.
-
Quote:
Originally Posted by basite
That looks like an awesome design indeed!
I agree with Kex though, brace it, brace it real serious!
what glue are you going to use to glue the layers to each other? whichever you use, be sure to do only 2 layers at one time, and clamp them, as good as possible, you don't want any holes in the glue...
btw, are you leaving the walls like that? or are you planning on using a filler of some kind (or cement, which might be more appropriate :p), to make it a smooth/real egg like enclosure?
Good luck, and don't cut your fingers of :p
Keep them spinning,
Bert.
Thanks Basite,
I will be cutting the disks at angles to match the curvature of the egg. Then lots of sanding. No filler.
I have 10 fingers today. My plan is to still have 10 fingers next week. Keep your fingers crossed for my fingers.
-
Quote:
Originally Posted by GMichael
Thanks Basite,
I will be cutting the disks at angles to match the curvature of the egg. Then lots of sanding. No filler.
I have 10 fingers today. My plan is to still have 10 fingers next week. Keep your fingers crossed for my fingers.
sounds like you have a plan :)
here's some more inspiration btw: link to an egg speaker!
-
Quote:
Originally Posted by basite
Cool. I especially like the ports in the stand. Nice.
-
Quote:
Originally Posted by GMichael
I was wondering about bracing. There are no flat walls that will be able to flex. I’m using all rings. Circles are much stronger than boxes. The walls will mostly be 2 inch thick except for a few that will be 4 inch thick. Will there still be a need for bracing? If so, I could just make one ring a solid disk and then cut a bunch of holes in it.
Well, I'll be honest, I'm not 100% sure how the fact it's a bunch of rings glued together will affect things as far as need for bracing, but I know a brace won't hurt. It's not the shape's ability to carry weight as much as the depth and density of the material. The pressure inside is going to make the cabinet want to resonate. The adjacent sides of the rings are coupled to themselves since they are circles so there's not really adjacent sides, but energy is transferred through each layer where connected by adhessive. I don't think bracing vertically is going to be effective or possible but a shelf brace is easy to do, just cut big holes like you said...in rectangular cabinets, they often look like window frames. I just make holes with jigsaw - they dont' have to be symmetncal or pretty.
But I have seen many formed MDF or similar curved shape MDF cabinets cut like the layered rings you're using, - and bracing is used in these designs- which leads me to believe it's a good idea or those builders are also playing it safe.
Besides, if small monitor and tower speakers are being braced with 5"-7" woofers, 18" subs probably need it too :). 18" subs with 30 mm of xmax move a lot of air compared to 5" woofers in 3/4" mdf boxes.
This is one of those better safe than sorry things. I know some builders that swear not to go more than 8" without brace. And bracing mattered big time in my first 15" sub which was 1.5" thick. I learned the hard way - it's easier to spend 15-20 minutes cutting and including a brace now, then adding one later once the box is sealed. The second cabinet I built I rabbeted spot for the shelf brace.
I think a brad nail or two while gluing each layer might not be a bad thing either, rather than just clamps, assuming you have access to a brad nailer.
Looks like you're well on your way though.
Edit: One last thing - having 1 or 2 shelf braces inside also should help make applying damping material to the walls a bit easier.
-
1 Attachment(s)
Quote:
Originally Posted by GMichael
Uh yeah.... It's because you've been in the medical field too long. That's what we'll go with.... :nonod:
What's my excuse?:ihih:
Seriously it looks like a great design. Here is a photo of the Magico Mini cabinet and they had an interesting way of creating bracing by not removing as much material from all the pieces stacked together.
-
Quote:
Originally Posted by JohnMichael
Seriously it looks like a great design. Here is a photo of the Magico Mini cabinet and they had an interesting way of creating bracing by not removing as much material from all the pieces stacked together.
OOooooooo.... Nice!
I like it.
I am thinking of just leaving a couple of the rings as full disks and then cutting a bunch of holes in them.
-
Quote:
Originally Posted by audio amateur
Kex, do sealed speaker enclosures generally need to be loosely stuffed? Does this also apply to sealed subwoofer enclosures?
I have never had luck heavily stuffing a sealed cabinet but a lot experimenting is needed usually to find just how much. I tend to use a mix of insulation, foam and polyfill/acousta-stuff.I think this could be a personal preference thing too...not much of an answer, sorry.
-
1 Attachment(s)
OK Kex
Since a few people seem to think that I didn't have enough bracing, here is the new design. Who's going to come over and help me drag this thing up the stairs when it's done?
Is that enough bracing?
-
Cutting begain last weekend. There were a lot of setbacks at first, but now it's moving along well. I have 15 rings cut and the rest have all been drawn out. Just need to connect the dots and then I can start stacking.
-
I'd wait for Kex's verdict but it looks good. Make sure the holes in the braces are large enough. I'd say cut out the equivalent of the surface area of the driver or more in each brace to allow easy air flow between the different compartments of the enclosure.
Keep it coming and post some pics if you can, me wants to see the beast in construction
-
Quote:
Originally Posted by audio amateur
I'd wait for Kex's verdict but it looks good. Make sure the holes in the braces are large enough. I'd say cut out the equivalent of the surface area of the driver or more in each brace to allow easy air flow between the different compartments of the enclosure.
Keep it coming and post some pics if you can, me wants to see the beast in construction
The braces will look like wagon wheels. A solid center, 4 spokes, and a 2 inch ring/wheel. There should be plenty of room for air flow.
I do have a question though. Should I have the spokes from one brace line up with the spokes from the other braces, or should they be staggered to brake up the sound waves better?
-
You can probably go with either. As you say, if they aren't aligned they might help with standing waves. To what extent I'm not sure...
-
Can an egg have standing waves?
-
You got that thing built yet? :)
-
Quote:
Originally Posted by kexodusc
You got that thing built yet? :)
Smarty pants!
Any ideas or commrnts? (jokes not withstanding)
-
No, not really. Think you've got enough info to go ahead. If it doesn't work well, making a box is cheap and easy, so low-risk here. You've got far more patience than I do with the amount of cutting and sanding you're looking at. But pictures of this will spread all over the world, I'm sure.
-
Quote:
Originally Posted by GMichael
I could use someone to hold my wood while I cut it.:ihih:
Your wife doesn't have issues with another dude holding your 'wood'?
-
Quote:
Originally Posted by atomicAdam
Your wife doesn't have issues with another dude holding your 'wood'?
Or having it cut.....:nonod:
-
Quote:
Originally Posted by GMichael
Or having it cut.....:nonod:
At this point you might be too old to use it, I don't know? So having it cut might be some form of stimulation..:crazy:
Anyways - I wanna see photos (of the egg)!
-
I agree with the extra bracing. It's not so much that you need it and would have to add it later, with the shape you have and the thick walls you don't really "need" bracing at all. But I would always do bracing as it's the most efficient way to get a stiff box. With bass it's all about stiffness and there is never too much.
There is no need to "break up sound waves." Design your bracing for maximum stiffness and you should be fine. With a sealed box, it's not so much what goes on inside the box, but what gets out. There are two ways to get out of the box:
1. Through vibrating the enclosure - this is what most worry about and it's important, but not as much as
2. Re-radiating through the cone itself - this is controlled by the damping of the driver
The second is a much overlooked problem, described here:
http://www.rythmikaudio.com/re-radiation.html
Consider this. You have very stiff and thick walls - 2" right? They will be as solid as you can make them. Now you have an 18" light weight cone that is designed to be compliant so that it can efficiently create bass. Which do you think provides the easier path for sound to get out of the box? Here we are not talking about transmission so much as the sound pressure waves from inside the box placing dynamic pressure on the cone, just like an active driver will cause passive radiators to move. It is the same except the active driver has an electric motor which resists interference. The driver Qts indicates the ability of the driver to reject this influence.
-
Quote:
Originally Posted by paulspencer
I agree with the extra bracing. It's not so much that you need it and would have to add it later, with the shape you have and the thick walls you don't really "need" bracing at all. But I would always do bracing as it's the most efficient way to get a stiff box. With bass it's all about stiffness and there is never too much.
There is no need to "break up sound waves." Design your bracing for maximum stiffness and you should be fine. With a sealed box, it's not so much what goes on inside the box, but what gets out. There are two ways to get out of the box:
1. Through vibrating the enclosure - this is what most worry about and it's important, but not as much as
2. Re-radiating through the cone itself - this is controlled by the damping of the driver
The second is a much overlooked problem, described here:
http://www.rythmikaudio.com/re-radiation.html
Consider this. You have very stiff and thick walls - 2" right? They will be as solid as you can make them. Now you have an 18" light weight cone that is designed to be compliant so that it can efficiently create bass. Which do you think provides the easier path for sound to get out of the box? Here we are not talking about transmission so much as the sound pressure waves from inside the box placing dynamic pressure on the cone, just like an active driver will cause passive radiators to move. It is the same except the active driver has an electric motor which resists interference. The driver Qts indicates the ability of the driver to reject this influence.
Thanks Paul. All great info.
I think the shape of the "box" in this case should help cut down on the re-radiating factor. What do you think there?
I also plan on adding 2 inch Mineral Wool inside. The driver manufacturer suggests a half fill.
Thanks for the link. I guess all those curved speakers (IE:B&W) are not just for looks.
Here are the specs on the driving I will be using.
Fs: 17.4 Hz
Le: 4.0mH
Re: 3.8 Ohms (Voice Coils wired in series)
Qms: 3.62
Qes: .42
Qts: 0.37
Mms: 525g
Cms: 0.16 mm/N
Vas: 313L
Sd: 1182 cm^2
BL: 22.9
X-max: 32mm
Pmax: 1500W
SPL: 87.8 db/1W/1M
-
1 Attachment(s)
OK, I have been on vacation for a bit so I haven't been posting my progress here. On the bright side, I was able to get a bit done. Let's start it off with a pic of the scrap wood. What a frickin' mess. It's a good thing that honey was away for two weeks.
-
1 Attachment(s)
Here are the good rings that will be put to work.
-
1 Attachment(s)
Inventory had to be taken.
-
1 Attachment(s)
A view of some of the stuffing, and one of the braces.
-
1 Attachment(s)
Half an egg is better than none?
|